 01642 224544
Welcome to the cutting edge of cultivation. Hydroponics offers unparalleled efficiency and explosive yields, but it is a discipline of precision. Unlike traditional soil growing, where the medium acts as a buffer, in a hydroponic system, you, the grower, are in direct control of every single variable. This incredible control is both the greatest advantage and the steepest learning curve.
If you are a beginner, it can be overwhelming to navigate the myriad choices in lighting, nutrients, and environment. Many growers spend years chasing optimal results, often making small, fixable mistakes that limit their potential. At Great Stuff Hydroponics, we’ve distilled decades of expert experience into five non-negotiable essentials. Master these five foundational areas, and you will dramatically shorten your path to achieving professional-grade results from your first grow.
Tip 1: Master Your Environment – Consistency is King
The single most common mistake made by new hydroponic growers is believing that controlling the reservoir is the main job. While critical, the air around your plants dictates their ability to perform. In a sealed environment, air temperature and humidity are the engines of growth, and inconsistency is the fastest route to plant stress, slow growth, and reduced yields.
Temperature and Relative Humidity (RH)
Hydroponic plants thrive in a stable, consistent environment. Fluctuations—such as a 10°C swing between day and night—cause significant stress, forcing the plant to spend energy adjusting rather than growing.
- Optimal Temperature: Aim for an ambient air temperature of 22°C to 26°C during the ‘lights-on’ period, dropping by no more than 3°C to 5°C when the lights are off. Extreme heat can inhibit nutrient uptake and cause rapid wilting, while cold shock can stop growth entirely.
- The Power of VPD: Experts focus on Vapour Pressure Deficit (VPD), which is the difference between the moisture pressure inside the leaf and the air around it. This calculation, which combines temperature and relative humidity, is the most accurate measure of plant transpiration (water evaporation from leaves). Getting your VPD in the sweet spot ensures the plant draws water and nutrients efficiently. Generally, you’ll want higher RH (60-75%) for young, vegetative plants and lower RH (40-60%) during the flowering/fruiting stage to prevent mould and powdery mildew.
You cannot manage what you do not measure. A high-quality Digital Environmental Controller is an essential investment, allowing you to automate fans, heaters, and dehumidifiers to maintain these tight tolerances. Pair this with a reliable Thermo-Hygrometer like the ETI Therma-Hygrometer with Min/Max and Alarm Functions for real-time monitoring and backup checks. Consistency is the secret ingredient that separates a good grow from a great one.
Tip 2: The Art of Nutrient Management – pH and EC/PPM Precision
In hydroponics, the nutrient solution is the lifeblood of your crop. Since the plants are not in soil, you have complete control over the mineral profile they consume. However, this means you are solely responsible for ensuring those minerals are accessible—and this is where pH becomes the ultimate gatekeeper.
pH: The Nutrient Lockout Barrier
The pH (potential of Hydrogen) measures how acidic or alkaline your reservoir solution is. For most hydroponic crops, nutrients are most bioavailable (e.g., in a form the plant can actually absorb) when the pH is maintained between 5.5 and 6.5.
- Below 5.5 (too acidic): Certain micronutrients become hyper-available, leading to toxicity and 'burn.' Conversely, calcium and magnesium can become locked out.
- Above 6.5 (too alkaline): Essential macronutrients, particularly phosphorus, and many micronutrients like iron and manganese, rapidly lock out. The plant starves even though the nutrients are present in the water.
The Expert Routine: Check and adjust your pH daily. pH naturally drifts, often rising as the plant consumes nutrients. Keep bottles of pH Up and pH Down (like Biobizz pH Up and Biobizz pH Down) on hand to make minor, controlled adjustments. Never guess; use a calibrated digital pH Meter, the Aqua Master Tools P50 Pro and ETI pH Pal Plus are great options.
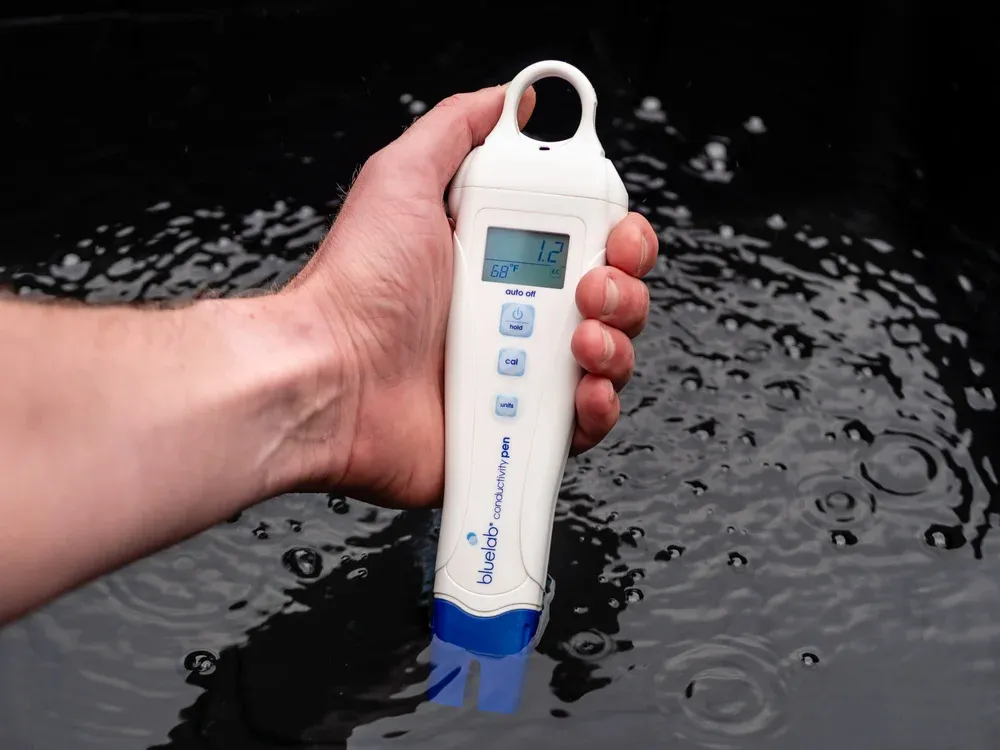
EC/PPM: The Food Strength
EC (Electrical Conductivity) or PPM (Parts Per Million) is the measurement of the total concentration of dissolved mineral salts (nutrients) in your water. It tells you exactly how much 'food' is available to your plants.
- Low EC: Plant starvation, leading to pale growth and slow development.
- High EC: Nutrient burn, causing leaf tips to curl and brown, and can lead to nutrient lockout as the roots are unable to absorb water due to osmotic pressure.
The ideal EC range depends on the stage of growth (low for seedlings/clones, high for peak flower/fruit), but learning to read the EC meter in conjunction with plant signals is a crucial skill. Invest in a reliable EC Meter like the Bluelab Conductivity Pen or Bluelab EC Truncheon and learn how to use it to monitor the drift in your reservoir. If the EC is rising quickly, your plants are drinking more water than they are consuming nutrients; if it is falling quickly, they are consuming more nutrients than water—both signals guide your next feeding adjustments.
Tip 3: Don't Just Use Light – Strategically Implement Intensity
Light is the fuel for photosynthesis, and in a closed-loop system, it must be delivered with precision. A beginner might simply hang a light and turn it on, but an expert focuses on two things: Spectrum (the colours of light) and Intensity (the quantity of light).
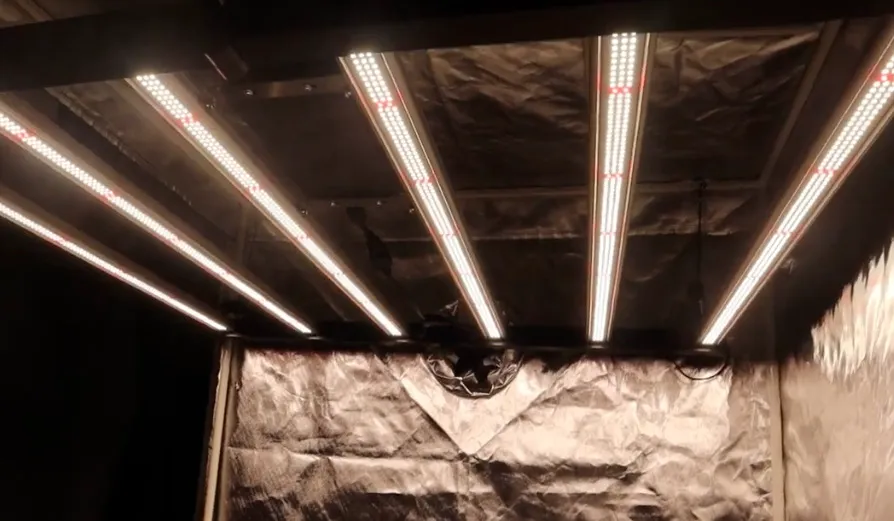
The Power of PPFD
While older High-Intensity Discharge (HID) lighting systems focused on Watts, the modern hydroponic expert measures light in PPFD (Photosynthetic Photon Flux Density). PPFD is the true measure of light intensity that actually drives photosynthesis and is measured in micromoles per square metre per second (µmol/s/m²/s).
- Vegetative Growth: Plants require lower PPFD, typically around 300 - 600 µmol/s/m²/s, to promote strong, bushy foliage and sturdy stems.
- Flowering/Fruiting: Plants require significantly higher PPFD, often 600 - 1000+ µmol/s/m²/s, to drive the energy-intensive process of flower and fruit production.
LED vs. HID and Distance Management
Today's top growers are overwhelmingly turning to high-efficiency LED Grow Lights. They offer adjustable spectrums, run cooler, and convert electricity into usable light more efficiently than legacy HPS or MH lamps run on Digital Dimmable Ballasts.
The critical expert tip is to manage the distance:
- Too Close: Can cause light stress, bleaching, and 'burning' of leaf tips due to excessive intensity or heat (especially with HPS).
- Too Far: Results in 'stretching,' where plants grow tall and lanky with thin stems as they desperately reach for the light.
Start high and slowly lower your light over several days, observing your plants closely. Always check the manufacturer’s suggested hanging height and intensity settings for your specific light fixture and phase of growth. Remember, maximising light efficiency also requires ensuring your grow room walls are covered with effective, highly reflective sheeting, such as the inner lining of a good quality Grow Tent, to bounce every photon back toward your plants.
Tip 4: The Unseen Hero – Exhaust and Air Exchange
Many beginners treat ventilation as an afterthought—just a way to manage heat. Experts know that ventilation is, in fact, the lungs of the grow room, responsible for three vital tasks: heat management, CO2 resupply, and humidity control. Stagnant air is a death sentence in hydroponics.
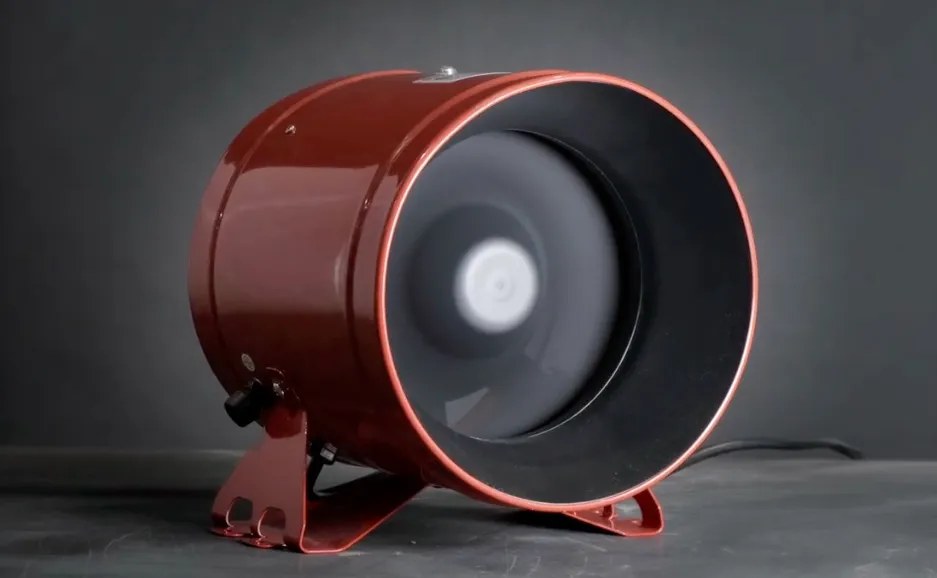
Sizing Your Extraction System
Your plants are constantly consuming CO2 for photosynthesis and producing H2O (humidity) through transpiration. If the air isn't exchanged, the CO2 levels quickly plummet, and the humidity soars, choking the plants’ ability to grow.
The expert rule of thumb is that your entire volume of grow room air should be completely exchanged every one to three minutes.
- Calculate Volume: Multiply the height, width, and depth of your grow room (in meters) to get the volume m³.
- Calculate Required CFM: To exchange the air every 3 minutes, multiply your volume (m³) by 20 (this gives you m³/hr).
- Choose Your Fan: Select an Extraction Fan like the Rhino Ultra EC Fan with an airflow rating (m³/hr or CFM) that exceeds this calculation to account for the resistance caused by Ducting and filters.
Odour and Internal Airflow
An essential requirement for any responsible UK grower is odour control. Your exhaust air must pass through a high-quality Carbon Filter like the Rhino Pro Carbon Filter. The filter must be correctly sized to your fan, or the fan will simply pull air around the filter, rendering it useless.
Finally, while your extraction system handles macro-airflow, you need air circulation fans inside the room to handle micro-airflow like the AC Infinity Cloudray S6 Oscillating Fan. These fans should gently rustle the leaves, strengthening stems and preventing pockets of stagnant, high-humidity air (microclimates) that are breeding grounds for mould and pests.
Tip 5: Proactive Prevention – Sterilisation and Sanitation
The closed-loop nature of hydroponics makes it incredibly efficient, but it also creates a perfect environment for waterborne pathogens, the most common of which is Pythium (Root Rot). A single outbreak can destroy an entire crop in days. The expert approach is one of rigorous, proactive prevention.
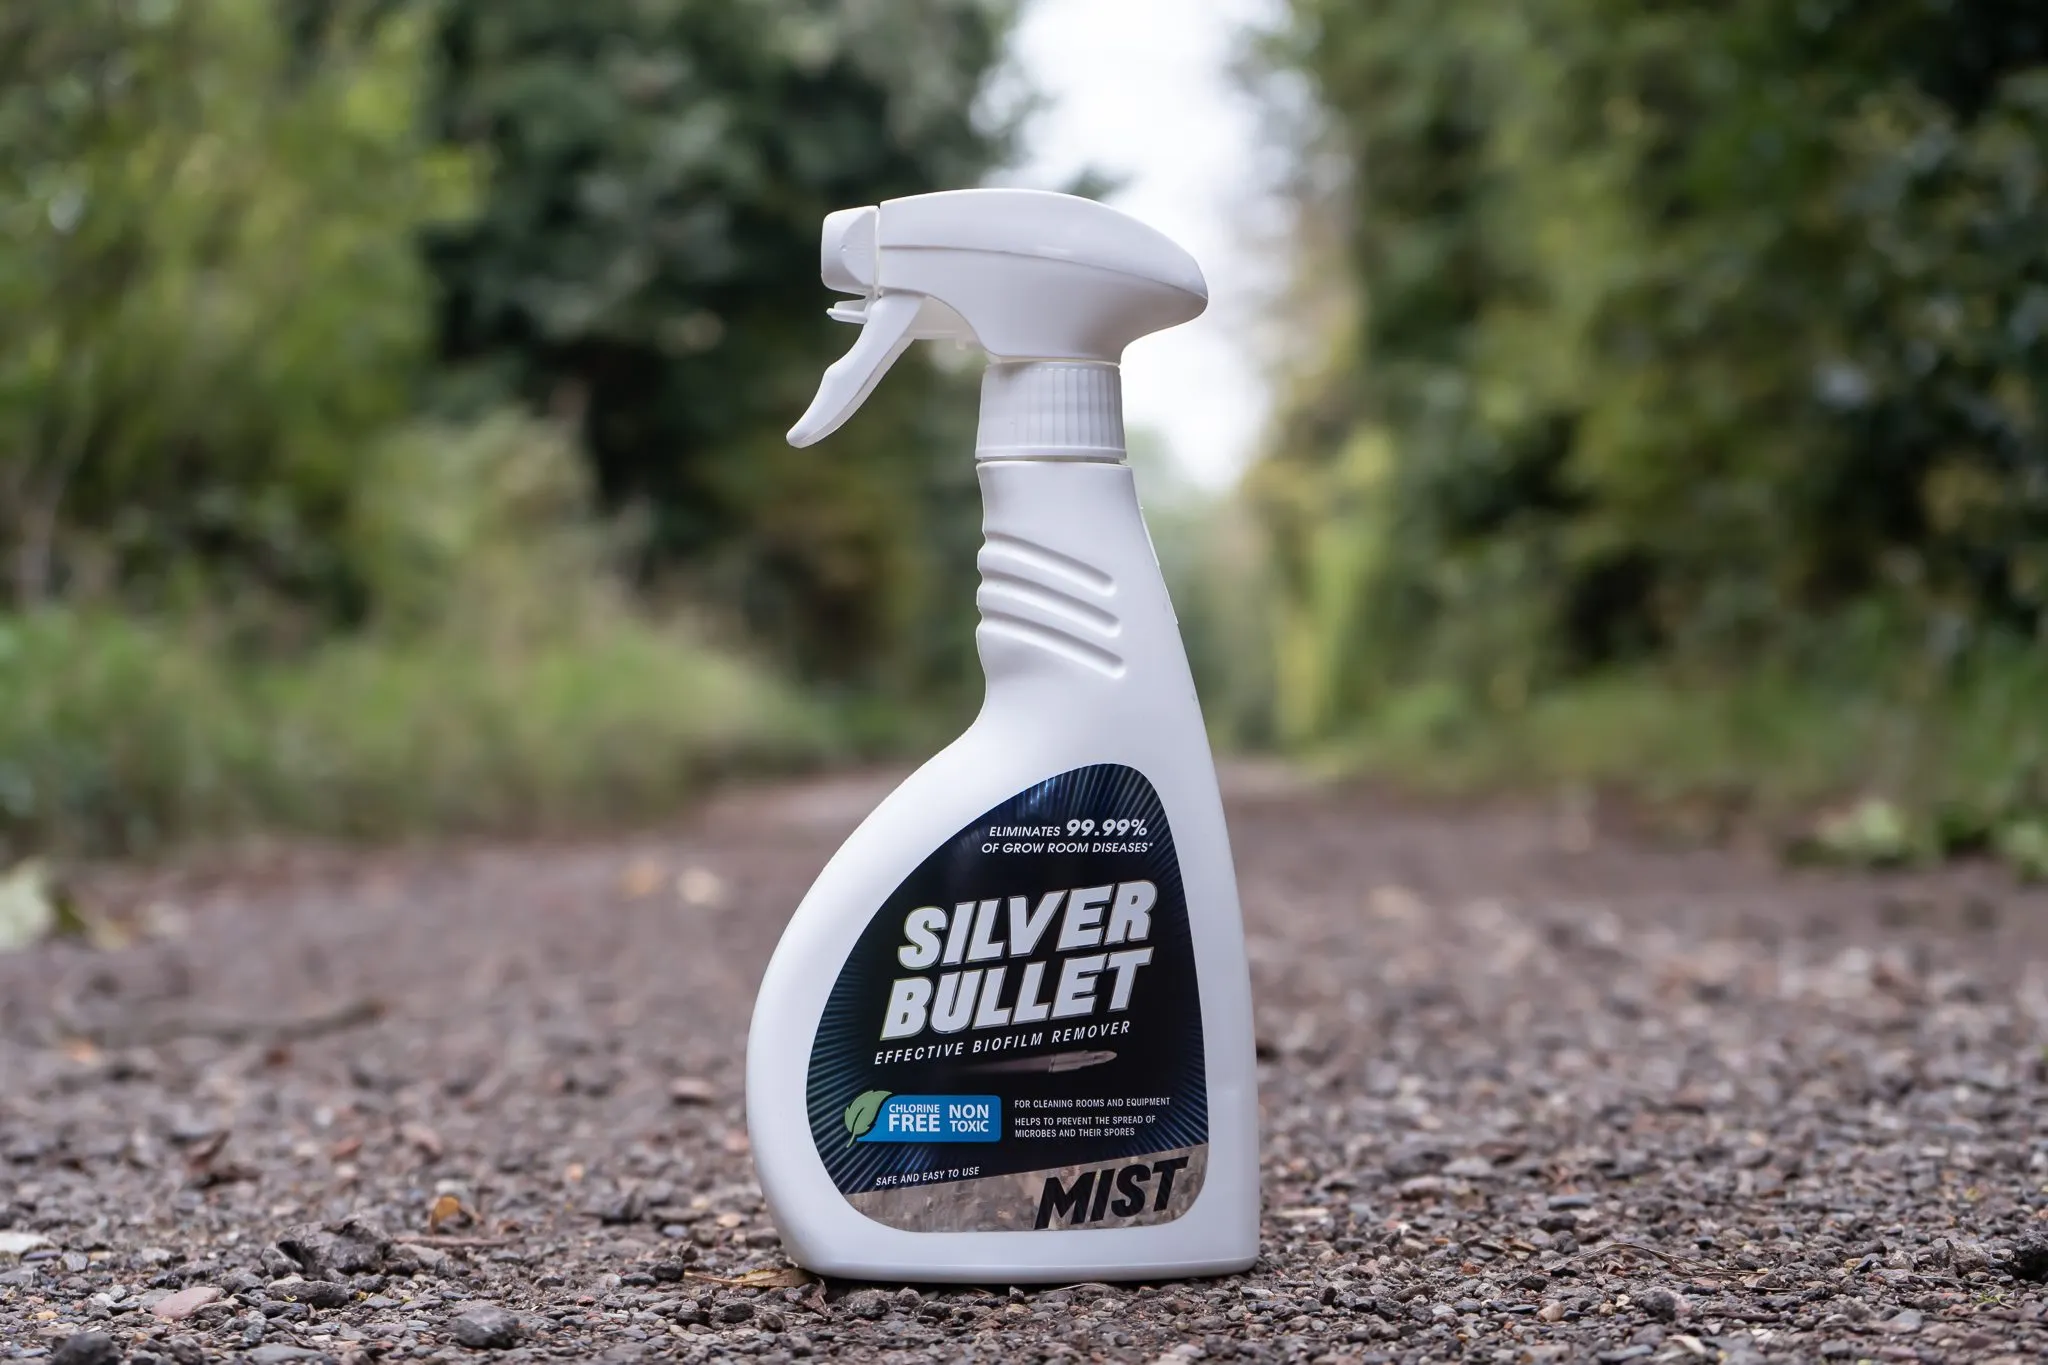
The Sterilisation Mandate
Before your very first plant enters the grow room, every single component that touches your water or nutrient solution must be sterilised. This includes the reservoir, pumps, drippers, tubing, and even air stones. Use a suitable reservoir-safe Reservoir Cleaner/Steriliser to wipe down surfaces and flush the system. An excellent option for this task is Silver Bullet Mist Spray. You are starting a clean slate, not inheriting one.
Daily and Weekly Routines
Sanitation is an ongoing process, not a one-time setup:
- Weekly Reservoir Changes: This is non-negotiable. Even with perfect pH and EC, nutrients become unbalanced over time. Drain the old solution, quickly wipe the reservoir, and mix a fresh batch.
- Daily Root Checks: Lift your system trays (if applicable) and visually check the roots. They should be bright white or cream-coloured. Brown, slimy, or foul-smelling roots are the first sign of an issue.
- Clean Spills Immediately: Nutrient solution is a sticky, sugary mess that attracts pests and promotes mould. Any spill outside the reservoir should be wiped up and sanitised immediately.
Integrated Pest Management (IPM)
The expert never waits for a pest problem. Implement an IPM strategy from day one. This involves non-chemical, preventative steps such as placing yellow Pest Control Sticky Traps in your grow room to catch flying pests and using beneficial insects or mild preventative sprays, if necessary. Stopping pests before they breed is infinitely easier than eradicating an established infestation.
Conclusion
Hydroponics is a rewarding journey built on the foundation of technical precision. The difference between a struggling beginner and a thriving expert often comes down to the commitment to consistency across these five critical areas. Stop chasing short-cuts and start mastering the fundamentals of a stable environment, precise nutrient delivery, intelligent lighting, efficient air exchange, and rigorous cleanliness.
By implementing these expert tips, you are not just setting up a grow room; you are engineering a high-performance growing machine.
Ready to put theory into practice? Head over to our shop to find all the essential equipment—from digital meters and controllers to the latest in LED technology—to ensure your hydroponic success starts today.